%20(2).avif)
%20transparent.avif)

Guide to creating high-quality AI videos with Wan 2.1
Ready to make awesome videos with AI? This fun guide will show you how to use WAN 2.1 – a cutting-edge AI video model from Alibaba – to turn your ideas into high-quality video clips. We’ll keep things simple and beginner-friendly, explaining any techie terms as we go. By the end, you’ll know the best settings (like video size and length), how to add music or voice, a step-by-step workflow, and tips to avoid common pitfalls. Let’s dive in!
What is WAN 2.1?
WAN 2.1 is a powerful AI video generation model – basically a smart program that can create short videos from a text description or an image. Think of it as a mini movie director: you give it a script (prompt) or a picture, and it produces a video clip for you. It’s open-source, meaning it’s free and the code/models are publicly available for anyone to use or improve.
Alibaba’s team trained WAN 2.1 on a huge amount of data (over a billion video clips!), so it learned to generate pretty realistic scenes using Wan 2.1 image to video (720p). It can handle text-to-video (T2V) and image-to-video (I2V) tasks, among others even some video editing and text-to-image. For a video version of this tutorial go here: Wan 2.1 Install Locally on PC using 8GB VRAM - Promptus
Cool feature: WAN 2.1 is one of the first video AIs that can even generate text inside the video (like a sign or subtitle in English or Chinese) if you ask for it. So you could, for example, prompt it to show a billboard with a message, and it will try to write it out. Overall, just remember WAN 2.1 = AI that makes short videos from your prompts – very handy for creative projects!
Tools for Run Wan 2.1 Model
You don’t have to be a coding genius to use WAN 2.1. Here are some user-friendly ways and tools to get started:
- Online Generators: Easiest option – Promptus has WAN 2.1 integrated, where you just enter a prompt and get a video. No installation needed (just beware of queue times or usage limits).
- Promptus App download (for Local Use): A popular app with a visual node-based interface (like flowchart blocks) that supports WAN 2.1. It lets you fine-tune settings easily. If you have a decent PC with a good GPU, you can install WAN 2.1 and load it in Promptus inside the ComfyUI tab.
- SwarmUI or Other UIs: Some community UIs (like SwarmUI, similar to ComfyUI) also support WAN 2.1, offering a simple web interface once set up.
- Hugging Face/Colab: If your computer isn’t strong enough, you can try cloud services. There are Google Colab notebooks and Hugging Face Spaces that run WAN 2.1 in the cloud (often limited to short 5-second videos due to cost).
- Direct GitHub + Python: For the tech-savvy, you can get the code from GitHub and run
generate.pywith your settings. This requires installing dependencies and downloading the model files (warning: the 14B model file is large!). The GitHub route is more manual, but gives you full control.
Hardware note:
WAN 2.1 has two main model sizes – 14B (big) and 1.3B (lite). The lite 1.3B model is optimized to run on consumer GPUs (~8 GB VRAM). For example, an RTX 3060 Ti or similar can handle the 1.3B model. The big 14B model needs more VRAM (ideally 16 GB or more) to run at higher resolutions.
If you have a high-end card like an RTX 4090 (24 GB VRAM), you can even use the 14B at 720p smoothly – one user reports ~4 minutes to generate a 5-second video at 480p on a 4090. So basically: almost any gaming PC can try WAN 2.1 with the small model, and beefier GPUs can use the full model for best quality.
Now that you have an idea of tools and setup, let’s talk about how to get the best quality output from WAN 2.1.
Choosing the Best Video Dimensions (Resolution)
One of the first decisions is how big (in pixels) your video frames should be. Higher resolution = sharper video, but also more work for the AI (slower and more memory). Here’s what we recommend:
- Go for HD (720p) if you can: The model was trained at two resolutions: 832×480 (often just called 480p) and 1280×720 (720p). The 720p option gives noticeably sharper details, so use it if your hardware can handle it. A GPU with ~16 GB VRAM (or more) is typically needed for 720p generation. On consumer GPUs with less memory, you might run out of VRAM at 720p.
- 480p for starters: If 720p is too slow or not working, 480p is still decent quality. You get a 832×480 video, which looks fine on small screens and is quicker to generate. The 1.3B small model is actually designed to output 480p by default (5-second clips). Read more from dev community. Don’t feel bad using 480p – you can always upscale later.
- Upscale to 1080p (Full HD) after generation: WAN 2.1’s own generation beyond 720p (like trying 1080p directly) isn’t recommended on most GPUs – it can crash or produce artifacts if pushed too high. The better approach: generate at 480p/720p, then use an AI upscaler on the finished frames or video to reach 1080p. This two-step process yields cleaner results than forcing the model to do 1080p in one go. There are free tools like Video2X or VFIO, and even built-in nodes in ComfyUI to upscale frames (e.g. ESRGAN models). It’s an extra step, but worth it for a crisp final video.
Terminology check: Resolution just means the width x height of the video in pixels (e.g. 1280×720). Common labels: 480p = 852x480 (SD, DVD quality), 720p = 1280x720 (HD), 1080p = 1920x1080 (Full HD). Higher resolution = more detail, but also heavier files and slower processing.
In short: use 720p for best quality if your system allows, otherwise 480p is a solid fallback, and plan to upscale for full HD if needed.
Keep the aspect ratio in mind too: by default 16:9 widescreen is used (you can also do vertical 9:16 if you want TikTok style – e.g. 720×1280).
How Long Should Your AI Video Be? (Video Length)
WAN 2.1 excels at short clips. Remember, it’s not (yet) for making a full 2-hour movie on your laptop. Here’s guidance on video length:
- Recommended length: ~5 seconds per clip. Many users stick to around 5 seconds max (about 80 frames at 16 FPS) when generating a single clip. This length is long enough to show a small scene or action, but short enough to keep quality high and processing time reasonable. In fact, the default in some interfaces is 5 seconds.
- Why short? The longer the continuous video, the harder it gets for the AI to maintain consistency. After a certain number of frames, the model can start to “forget” what the initial frames looked like and drift off-topic (e.g., a character’s appearance might subtly change over very long sequences). Also, longer videos consume a lot more VRAM and time, increasing the chance of errors or weird artifacts.
- Need a longer video? You can stitch multiple clips together. For example, generate three 5-second scenes and edit them back-to-back. To make the transition smooth, you can take the last frame of clip 1 as a starting image for clip 2 so the scene continues thanks to its fancy architecture, but in practice it’s wiser to break things into parts and then combine. This way each part stays sharp.
- Frame rate (FPS): By default WAN 2.1 outputs around 16 FPS (frames per second). 16 FPS is a bit lower than standard video (which is usually 24 or 30 FPS), meaning the raw video might look slightly choppy.
Don’t worry – you can increase the frame rate after generation using frame interpolation. A popular trick is generating at 16 FPS and then using a tool like RIFE (e.g. via the app Flowframes) to double the frame rate to 32 FPS, then play back at ~30 FPS for ultra-smooth motion). For most purposes, you can simply convert 16 FPS -> 24 FPS; the missing in-between frames will be intelligently guessed by interpolation software, resulting in a fluid video).
So the workflow is: generate the frames, then boost FPS if needed for smoothness.
So, keep it short and sweet. Aim for a few seconds per generation. If you have a storyline in mind, plan it in bite-sized scenes. You’ll get better quality and can then assemble the scenes like a storyboard.
Create a Video with WAN 2.1 Workflow
Let’s go through the whole process from idea to final video. Don’t worry – it’s easier than it sounds. Follow these steps:

- Come Up with an Idea – Imagine a short scene you want. For example, a “dog skateboarding on a rainbow” or maybe “a futuristic city with flying cars at sunset”. Be creative! If you want to include a specific style (cartoon, realistic, cinematic), note that too. This idea will become your text prompt. If you have a starting image (for image-to-video) – like a photo of a character you want to animate – keep it ready.
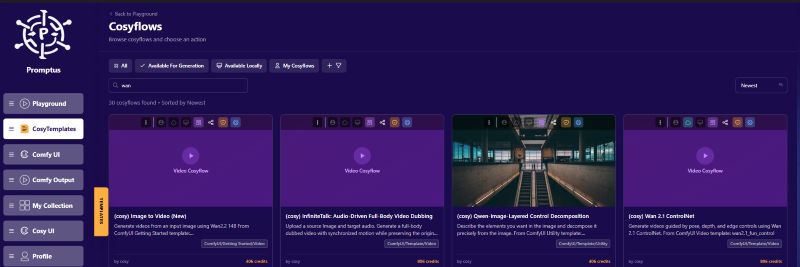
- Set Up the Tool – Launch your chosen interface. If you’re using Promptus, make sure the WAN 2.1 model is loaded (you might use a community workflow file or node setup specifically for WAN 2.1). In Promptus web app generator, just navigate to model section and select Cosy WAN 2.1.
- Choose the Mode: Select Text-to-Video (T2V) if you’re using a text prompt only. If you have an image to animate, choose Image-to-Video (I2V) and upload your image (and you can still add a text prompt to guide the style/scene). WAN 2.1 supports both modes.
- Resolution: Set the frame resolution as discussed (480p or 720p). Many UIs have a dropdown for common resolutions. Start with 480p if unsure, to test the waters.
- Frame Count/Duration: Decide how many frames or seconds. For example, at 16 FPS, 80 frames ≈ 5 seconds. Some interfaces let you just input the seconds and FPS and they calculate frames. Enter a modest number (e.g. “80 frames at 16 FPS” or “5 sec”).
- Other settings: There will be some sliders like “Guidance Scale” (how strictly it follows your prompt) and “Steps” (how many refinement iterations). Don’t be intimidated – good defaults are often provided. For WAN 2.1, a guidance scale around 5–7 is recommended (too high can cause flicker, we’ll explain below). You can set it to ~6 to start. Sampling steps around 20–30 per frame are common.
- Seed (optional): If you see a seed value, this just controls randomness. Any number is fine; setting a specific seed means you can reproduce the same result later. If you leave it random, the output might vary each run. For now, random is okay – you can always lock a seed on a take you liked to tweak further.
- Choose the Mode: Select Text-to-Video (T2V) if you’re using a text prompt only. If you have an image to animate, choose Image-to-Video (I2V) and upload your image (and you can still add a text prompt to guide the style/scene). WAN 2.1 supports both modes.
- Write Your Prompt – Enter your text prompt in the prompt box. Be clear and try to paint a picture with words. Include any details about setting, lighting, style, or motion. For example:
Prompt: “A knight in shining armor rides a flying dragon over a medieval city at dusk, cinematic lighting, smooth camera pan.”
This prompt tells the AI what to show (knight on dragon, medieval city) and even hints at camera movement (“smooth camera pan”).
WAN 2.1 does respond to certain motion keywords like “camera moving” or “walking” as it learned some basic motion patterns. Keep it one scene per clip – don’t try to have too many different actions in 5 seconds. Save separate actions for separate clips.
Tip: You can also use a negative prompt to tell the AI what not to show. E.g. “–no blur, no text, no watermark” to avoid unwanted artifacts.
- Generate the Video – Hit that “Generate” or “Queue” button! 🚀 Now wait as WAN 2.1 works its magic. It will take a bit of time since it’s making multiple frames. For a 5-second 480p clip on a decent GPU, this might be a couple of minutes of processing. If you’re on a Promptus online web app, it could be a few minutes more – just be patient, maybe grab a drink.
During generation, the model is essentially creating each frame step by step using a diffusion process - kind of like how AI image generators work, but with an added time dimension.
- Preview the Result – When it’s done, you’ll get a video file (often in .mp4 or .gif format) or a series of frames. Play the video and see how it looks! This is the exciting part – did the output match your vision? Maybe the knight and dragon are there, flying smoothly, or maybe you need to adjust something. Evaluate:
- Is the motion smooth? If it’s a bit low-FPS jittery, remember we can interpolate later.
- Are the visuals coherent? Check for any weird morphing or flicker between frames.
- Does it follow the prompt closely? Perhaps the “dusk lighting” looks more like noon; you might tweak the prompt or settings.
- Any unwanted quirks? For example, sometimes AI videos might have a flicker or the subject might change color slightly – these can often be fixed with settings.
- Refine if Needed – It’s common not to get a perfect video on the first try. Don’t be discouraged! Minor tweaks can improve it:
- Adjust prompt: If something important was missing, make it more explicit in the prompt. If something weird was present, you can add it to the negative prompt (e.g. “no text” if you saw gibberish text appear).
- Guidance scale: If the video had a lot of flicker or sudden changes frame to frame, your guidance might be too high. Try a slightly lower value (say 5 instead of 7). High guidance can make the AI over-correct each frame to the prompt, causing jitter. If the video was too off-topic or blurry, you might increase guidance a bit. It’s a balance.
- Steps: Increasing the number of diffusion steps per frame can sometimes sharpen details (with longer generation time). If you used 20 steps, you could try 30. If generation was very slow, you could reduce steps to speed up at some quality cost.
- Consistency aids: Advanced tweak – if using Promptus, there are ways to improve consistency (like feeding each frame into the next, or using the last frame as the start for the next diffusion). But if you’re a beginner, you might skip this or use community workflows that have those nodes set up. Often, WAN 2.1 does a decent job out-of-the-box thanks to its internal design that already aims for temporal consistency (it has something called a spatio-temporal VAE to help keep motion smooth.
- Try image-to-video: If pure text-to-video isn’t nailing a complex subject, one trick is to generate a single image first (with an image AI or WAN 2.1’s text-to-image ability) and then use that image as a starting frame via image-to-video mode. This can lock in the look of a character or scene, and then the model only has to animate it rather than invent from scratch.
- Adjust prompt: If something important was missing, make it more explicit in the prompt. If something weird was present, you can add it to the negative prompt (e.g. “no text” if you saw gibberish text appear).
- Upscale and Boost FPS (Optional) – Once you have a clip you like, you can post-process it for even better quality:
- Upscaling: If your final goal is a higher resolution, take the frames or video and upscale. Some tools let you upload a video and will AI-upsample each frame. For example, Topaz Video AI (paid) or free ones like Video2X, or even using Stable Diffusion’s img2img with a high-res model on each frame (a bit advanced). If you generated in 720p and are satisfied, you might skip this. But if you only got 480p due to hardware, upscaling to 720p or 1080p will make it look much sharper when viewed fullscree . Make sure to use an AI-based upscaler for best results (they add detail), not just a simple resize.
- Frame interpolation (for FPS): As discussed, you can smooth the motion by increasing the frame rate. Tools like Flowframes (which uses RIFE AI) are perfect for this: you load your 16 FPS video, select “multiply frames by 2” and it will output a 32 FPS video. You can then play that at normal speed (effectively slow-mo or extra smooth) or drop some frames to target 24/30 FPS. The result is a much more fluid video without changing the content. This step is optional but can make a noticeable difference for action scenes.
- Upscaling: If your final goal is a higher resolution, take the frames or video and upscale. Some tools let you upload a video and will AI-upsample each frame. For example, Topaz Video AI (paid) or free ones like Video2X, or even using Stable Diffusion’s img2img with a high-res model on each frame (a bit advanced). If you generated in 720p and are satisfied, you might skip this. But if you only got 480p due to hardware, upscaling to 720p or 1080p will make it look much sharper when viewed fullscree . Make sure to use an AI-based upscaler for best results (they add detail), not just a simple resize.
That’s the basic workflow. Next, we’ll cover some best practices and common mistakes so you can troubleshoot and refine your videos like a pro.
Pro Tips for Great AI Video Results
Even with the steps above, there are some extra pointers that can take your AI video from good to great. Here are some do’s and don’ts:
✅ Keep prompts consistent for one scene: If you’re generating a single clip, avoid changing the description mid-way. For example, don’t have a prompt that starts talking about a forest and ends talking about the ocean in one go – the model will get confused frame to frame. One scene = one prompt.
You can always do a separate clip for the next scene. Consistency in the prompt leads to consistency in the video. If you need a transition, do it in two clips and merge via editing. Sudden prompt switches can cause jarring flicker or scene jumps.
✅ Use moderate guidance (CFG Scale): As mentioned, a guidance around 5–7 is usually best for video. This keeps the AI following your prompt without overdoing it. Don’t max it out to 15 or 20 – high CFG can make each frame try so hard to match the prompt that it ends up introducing flickering lights or morphing details between frame. On the flip side, too low (like 1 or 2) and the AI might drift off and add random stuff. So, Goldilocks rule: around 6 is just right for most cases.
✅ Ample sampling steps (but not extreme): If your video frames look a bit rough or low-detail, consider increasing the diffusion steps slightly (e.g. from 20 to 30). This gives the AI more iterations to polish the frame. But going too high (like 50+ per frame) will slow things down a lot for arguably minimal gains. Also, whichever sampler you use, stick to it for the whole video (don’t change per frame). Consistency helps avoid any weird continuity issues.
❌ Don’t try to generate an extremely long video in one go: We can’t stress this enough – generating, say, a 30-second clip in one pass is likely to end in disappointment (if it even finishes without out-of-memory). Not only is it slow, but the latter part of the video might degrade in quality or start deviating. Break longer content into chunks of a few second. It’s easier to manage and you can always glue them together after. If you do want a longer uninterrupted shot, you can use the trick of using the last frame of a generation as the first of the next, to maintain continuity across segment.
❌ Avoid ultra-high resolutions directly: As mentioned in the resolution section – jumping straight to 1080p or beyond inside WAN 2.1 is asking for trouble on normal hardware. You risk crashes or weird distortion. It’s more effective to generate at the trained resolutions (480p/720p) and upscale later for clarity. The model’s training sweet spot is those sizes, so stick to them for generation. If you need 4K… well, maybe in a future version or use external up-scalers multiple times (but that’s advanced and heavy).
❌ Don’t cram too much action in one scene: If your prompt tries to have “a car race, followed by an alien invasion, then a dance party” all in one 5-second clip, the result will likely be a messy blur. Focus on a single concept or continuous action per clip. If you want multiple things, plan multiple clips. This also applies to camera movements – one clip could be “camera pans around character” but don’t also try to zoom and pan and do 10 things at once. Simpler is safer, especially as you learn. You can always get fancy by editing multiple AI clips together for complex sequences.
✅ Leverage interpolation for smoothness: We already covered this, but it’s a common “aha” moment for newcomers. If you find the motion a tad choppy, the solution isn’t to generate at a higher FPS (which just costs more frames and VRAM) – it’s to use interpolation afterward. Increasing the model’s FPS directly means more frames to keep consistent (harder) and more memory us. So, generate at around 16 FPS which the model is, then rely on interpolation software to reach 24/30 FPS. This preserves quality and saves a ton of compute.
✅ Use the right model for your GPU: If you keep running out of memory or the software crashes, you might be trying to use the 14B model on a GPU that can’t handle it. Switch to the 1.3B model (often labeled as “wan2.1-t2v-1.3B” or similar in the UI) for a lighter load. The output might be slightly less detailed, but it’s still very good – and a stable render beats a crashed one!
Alternatively, some communities have released 8-bit or 4-bit quantized versions of WAN 2.1 that use less VRAM at a small quality trade-off. These can allow the 14B model to run on 8–12 GB cards.
❌ Don’t overlook negative prompts: If your videos often come out with unwanted artifacts (like text blobs, watermarks, or odd objects), try using a negative prompt to explicitly forbid them. E.g., add ("text":1.2), (watermark), (logo) in the negative prompt field (syntax may vary by interface). It’s not guaranteed, but can help the AI steer away from those elements. For instance, some models sometimes put jumbled text as if it’s a signature – a negative prompt can reduce that likelihood.
✅ Save your work and settings: When you finally get a result you love, note down the settings (or save the project in the UI). That way, if you ever want to re-render or adjust it later, you have the recipe. In Promptus, you can save the workflow graph. In other UIs, you might save a preset. At minimum, jot down the seed, prompt, steps, guidance, etc., perhaps in a text file. This is super helpful as you experiment more.
Troubleshooting Quick Fixes:
- Issue: Video flickers or has rapid color changes – Try lowering CFG guidance, ensure your prompt isn’t contradictory, and keep consistent lighting in the description. Also, confirm you’re not inadvertently changing the seed each frame (most UIs handle this for you).
- Issue: Subject changes appearance mid-way – The concept might be too complex or the model is struggling to maintain it. Using an initial image (I2V mode) can lock the subject. Or break the video into two segments and maybe re-strengthen the prompt in the second. For example, for a 10-sec sequence of a character, generate first 5 sec, then use last frame + prompt to generate next 5 sec. This reminds the model what the character looked like.
- Issue: Out of Memory errors – Reduce resolution (720p -> 480p), or reduce frame count, or use the smaller model variant. Also, close other programs using your GPU. If using a UI like Automatic1111 or ComfyUI, make sure you’re not accidentally keeping a huge history of frames in memory. Sometimes generating in diffusion batches (one frame at a time sequentially) is necessary instead of all frames in one batch. Many UIs do one-by-one by default to save memory.
- Issue: Video is blurry or low detail – Increase steps a bit, or use a higher resolution model if possible. You can also try an upscale + refine technique: generate at 480p, then take each frame and run it through a powerful image model (like Stable Diffusion XL) with a low denoise to enhance details without changing content. This is advanced but yields sharper frames. There are scripts to automate this frame-by-frame enhancement. Otherwise, just rely on a good upscaler.
- Issue: Strange distortions at borders or bottom of frames – This can happen if the AI’s VAE (the part that decodes images) struggles. A trick here is to enable “tiling” for the VAE if the option exist , or simply crop a tiny bit off the edges in post. Make sure you’re using the correct VAE for the model if that’s a manual setting.
By following these tips and watching out for the common hiccups, you’ll significantly improve your outcomes. The key is to iteratively refine – even professionals in AI art make several tries to get the perfect clip. Each attempt teaches you something new about what WAN 2.1 likes or dislikes.
Wrapping Up
WAN 2.1 opens up a world of creative possibility – it’s like having a virtual movie studio that fits on your desk. With this guide, you now know how to harness it: choose the right frame size, keep your videos short and sweet, add audio for extra flair, and use the step-by-step workflow to go from an idea to a polished AI-generated video. We’ve demystified the jargon (frames, resolution, FPS, etc.) and given you insider tips on avoiding flicker and other pitfalls.
Now it’s your turn to unleash your imagination. Whether you want to make a surreal music video for a song, animated concept art for a story, or just have fun creating meme-worthy clips, WAN 2.1 is an incredible tool at your disposal. A 19-year-old with a wild idea and this AI can create something that would’ve taken a whole animation team to make in the past – how cool is that?
Final thought: Experiment, enjoy the process, and don’t be afraid to fail forward. Some of your experiments will be hilariously off-target – that’s part of the learning! But many will also be stunning. As AI tech improves, you’ll be at the forefront of this new form of content creation. So keep refining those prompts and settings, and you’ll be crafting high-quality AI videos like a pro in no time. Happy creating! 🚀


